Timber floors are a time-proven choice. They can give a room a warm feeling and create a relaxing, cosy atmosphere, turning a house into a home. And, when it comes to engineered timber flooring installation, it couldn’t be easier – you can even do it yourself!
So, if you’ve got your eye on this flooring type for your home renovation, read on! In this post, we’ll talk all about how to properly lay timber flooring, as well as what a floating timber floor is and how much it costs.
What is a floating timber floor?
Timber flooring is an excellent choice if you want to add a cosy touch to your abode. It’s a durable, natural, and easy to maintain flooring surface. Timber floors are warmer than tiles and more polished than carpeting, so it’s a popular choice among homeowners. Not to mention the fact that you can install them on your own if you have the proper tools and knowledge!
Next to laminate floorboards, timber flooring is another widely popular option. Unlike solid timber, this type does not require nailing or using adhesives to permanently stick the boards to the existing floor in your home, making installation a breeze.
So, how is it done? Floating timber flooring installation relies on the click-and-lock technique – the planks simply snap together. Easy, right? Engineered hardwood floors consist of different layers of wood and plywood, making it a fairly durable and affordable option. The easy installation method also lowers the chances of warping and movement
How to lay your timber flooring (Step-by-step)
As we’ve already said, installing engineered timber planks is easily manageable. However, you still need some preparation beforehand. Having the right tools for the job is essential, too. Therefore, we have everything covered for you below, so you can start the process right away!
Essential tools
- Hand saw
- Pencil
- Underlay
- PVA glue
- Measuring tape
- Moisture metre
- Jigsaw
- Spirit level
- Expansion spacers
Preparational work
To avoid mistakes, it’s vital to learn about the proper conditions required when laying the engineered flooring type, and do a few tests to see if your site is suitable for the process. If you cover the requirements listed below, then you are good to go:
- The air humidity should ideally be 45-65%, which can be measured with a hygrometer. This is considered normal for Australian homes, and it’s essential to maintain it after the installation to avoid problems, such as floor lifting.
- Timber based sub-floors must have an MC (Moisture Content) of up to 12%.
- Concrete sub-floors must also have an MC (Moisture Content) of 12% or less (or under 3% if using a concrete moisture meter). Note that some metres have different scales, so don’t forget to read the manufacturer’s guide.
- Engineered hardwood flooring must be laid on a level surface. To check if you’re good to go, place a long straight edge on it and keep an eye for any height variance. There shouldn’t be more than 3mm in height variation over a 1m length. A quick fix for uneven subfloors is to use a self-levelling compound or plywood.
When you’re certain the conditions are suitable, you can acclimate the timber flooring. Acclimatisation helps balance the moisture levels in the wooden planks with the ones in the room. To do so, open the box of planks and leave it in the room where they’ll be installed for 5-7 days. This will let the wood adapt to the room and prevent lifting and expanding after the flooring has been installed.
The process of laying floating timber flooring
Now we get to the main event – the actual installation work.
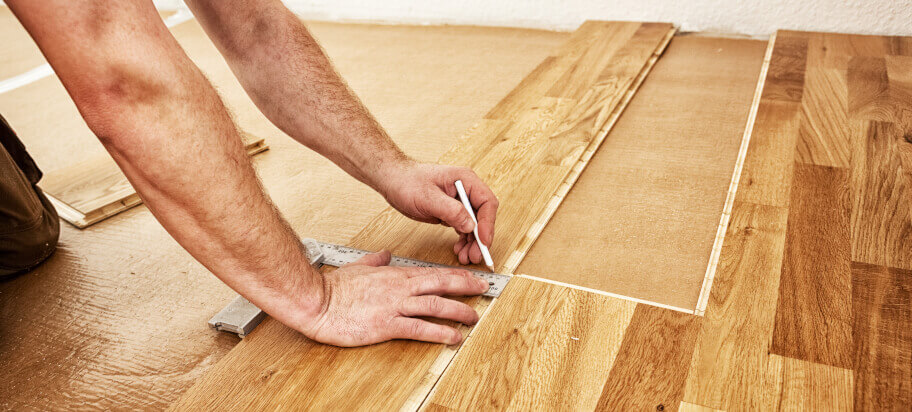
- Clear the floor – First things first, remove any and all existing floor covering and inspect the subfloor. Keep in mind, you must leave expansion gaps around the edges when installing engineered timber flooring – around 10mm should be enough to allow for expansion and prevent buckling.
- Put down the underlay – Once the subfloor is prepped and ready, start laying the timber flooring down. Since you’ll be probably working with the easier click-and-lock system, you’ll need to apply an underlay sheet below. This is mainly done to make the surface more comfortable and reduce the noise, as floating floors can sound hollow since they’re not attached to the subfloor.
- Lay the planks – After you’ve put down the underlay, you can start laying the timber planks. Just snap the planks together and lay them down! In case you’ve purchased planks with the tongue and groove fitting method, it is also possible to glue the groove or use nails to stop the floorboards from moving altogether.
If all of this seems overwhelming or you are facing difficulties fitting the planks together, you can always seek the help of a floating floor installation specialist!
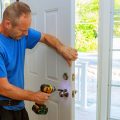
Professional floor installation services near you!
Contact usFor questions about the services we, you can get in touch.
Can you install timber flooring over tiles?
Yes, in most cases, laying timber flooring over tiles is completely fine. However, there are still some aspects you need to consider in order to do it right.
As with any type of subfloor, the surface over which you’ll be laying the flooring needs to be level. Fix any imperfections before installing the floorboards for the best results.
Floating timber flooring can be installed on top of tiles using the same method mentioned above, but when doing so, the height of the floor will inevitably be raised. This can result in tripping hazards or clearance issues for doors, so take this into consideration.
What’s the cost to install timber flooring?
The cost of floating timber flooring installation per square metre in Australia can range from about A$30 to A$45, depending on the area you live in. There are several other factors that weigh on the price as well, for instance:
- Type of material – Including the price of the material is important for properly estimating the final price of your whole renovation project. Timber floorboards come from different timber species. The prices vary as different species come in different quality, colour, wood grain, etc. Some popular floating timber floor choices are Blackbutt, Jarrah and Bamboo.
- Size of the room – Naturally, the bigger the space that needs to be covered, the higher the number of planks you will need for the floor.
- Qualifications of the professional – If you decide to seek professional help, naturally, your expenses will rise. To make sure your money won’t go down the drain, you should only trust certified installers to do the job. Prior to the installation, you can give them details on the site so they can send you a rough estimate. Or, in order to get the most accurate price, scheduling a viewing is mandatory.
Takeaways
- Timber floors are durable, easy to maintain, provide a cosy look to your abode, and are sustainable.
- Floating timber flooring needs to be installed over a level surface and has specific humidity requirements.
- Installing engineered timber flooring is easy, as it normally uses the click-and-lock system.
- The cost of laying a timber floor mainly depends on the choice of material and installation method.
Create a cosy atmosphere in your house by laying timber flooring!
Contact usContact a qualified handyman for a quick home renovation.