With the growing concern regarding the negative human impact left on the environment, many homeowners in Australia are starting to pay more attention to cork flooring as an eco-friendly alternative to hardwood.
Moreover, a lot of people opt for it due to the fact that it’s water-resistant, affordable, and easy to install by beginners! Even though cork flooring is popular nowadays and has many advantages, like any other flooring material, it also can have its disadvantages. In order to better understand the specific characteristics of this type of flooring and make an informed decision for your property, we have created this article to help you in the process.
What is cork flooring and how is it made?
Cork is made from the bark of a cork oak tree. It is grounded, then processed into a sheet, and baked to produce tiles that can serve as flooring for various spaces. The cork itself is hand-harvested every few years from plantations grown for commercial reasons and it is done in a way that allows the tree to continue regenerating new bark.
Cork flooring is often prefered for bathrooms, basements, and kitchens for its water and mildew resistant qualities. If installed properly and taken care of, cork flooring can be durable and have a longer life span. Maintaining it is easy but also very important. The main care cork requires is regular sweeping and vacuuming, which prevents dirt from scratching the floor.
Cork flooring – Pros & Cons
In recent years, cork flooring has grown in popularity among Australian homeowners. As a sustainable flooring option, it comes with a long list of benefits. However, disadvantages are not missing either, so it’s good to be properly informed before making an investment. If you want to find out whether cork flooring is a solution for your space, check out our list of pros and cons:
Cork flooring advantages
- Water- and fire-resistant
- Made from a renewable material
- Warm, flexible, and soft surface
- Good insulator
- Suitable for a range of spaces
- Various ways of installation
- Hypoallergenic and antimicrobial
- Inexpensive
Cork flooring disadvantages
- Not as durable as other flooring materials
- Prone to damage
- Fades in sunlight
- Easily damaged by pets
- Heavy furniture can leave scratches and dents
Popular types of cork flooring
One of the many great things about cork flooring is that there are a lot of options on the market. The most popular choices available in Australia are the following:
- Glued down cork tiles – These cork flooring tiles are made entirely from cork (they don’t have a special base layer). Because of this, they are also called ‘solid cork tiles’. That is why they need to be glued down with a contact adhesive, which might seem like a difficult job. Still, the use of glue ensures a stronger hold and prevents water from slipping through the gaps. Additionally, thanks to being created entirely from cork, the tiles can be made to resemble natural wood floor patterns and colours.
- Floating cork flooring planks – Here the cork is attached to a substrate, such as fibreboard or plywood, and then installed over the subfloor or the existing floor. An adhesive is not used in this case – the cork flooring planks are clicked together with an interlocking system. The downside of this type of cork flooring is that it can be a little less water-resistant, which can lead to the planks curling up or plumping.
- Self-adhesive cork tiles – Also known as peel-and-stick cork tiles, this type of cork flooring comes with an adhesive backing that sticks to the subfloor. This prevents both the planks from moving and makes it quite easy to install. However, the self-adhesive is not that strong and the planks can peel from the adhesive backing. Even so, replacement is easy.
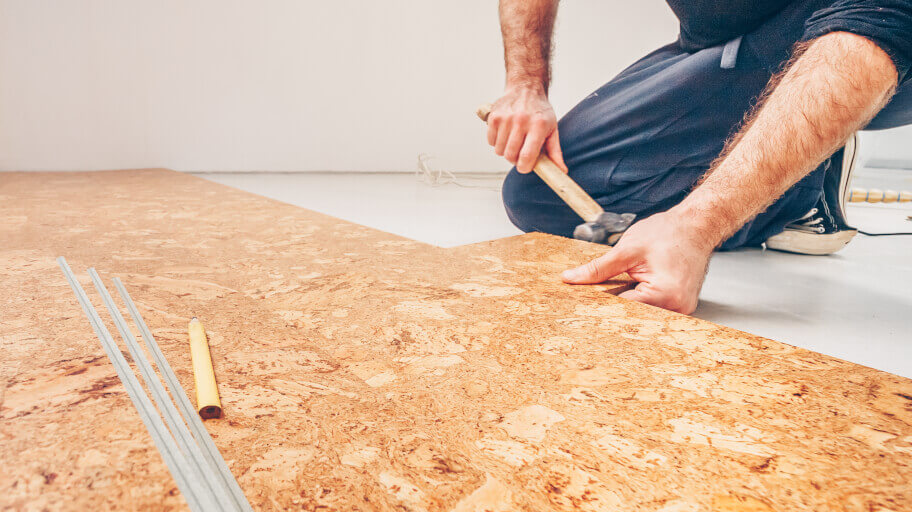
How to install cork flooring
With the right tools and skills, laying cork flooring can be a relatively easy DIY project. In this section, you will find easy-to-follow installation instructions for the different types of cork flooring, as well as all the tools and material that are required. However, performing the installation yourself can be a little tricky, so if you want flawless results, you can always seek out professional help.
If you still want to give it a go, we advise you to spend some time preparing for the installation process, regardless of your chosen cork flooring installation technique. Here is what you can do to prepare:
- Make sure to leave the cork flooring tiles/planks in the room for some time to allow them to acclimate.
- Clean the area so the surface is smooth, dust-free, and dry.
- Decide on the layout of the cork flooring prior to beginning of the installation.
- Remove any trim work, such as baseboard, quarter rounds, or shoe moulding.
Tools and materials
- Rubber mallet
- Rubber spacers
- Tape measure
- Tapping block
- Saw/Tile cutter
- Drywall sander
- Duct tape
- Pull bar
- Polyurethane
- Adhesive and notched trowel (for the glue down cork flooring)
Laying floating cork flooring
- Preparing the subfloor – Ensure the lack of lumps and imperfections by sanding the surface or applying a ‘skim coat’. As the unglued seams of floating planks can absorb water, a moisture barrier can prove to be useful. Unroll a plastic, tar paper or vinyl moisture barrier over the subfloor and staple it down. In the case of a concrete floor, use duct tape to secure the barrier.
- Laying the floating cork planks – Start installing the cork planks one row at a time, leaving a 1-2 cm gap between the edge of the planks and the walls. Snap the planks together using a tapping block and rubber mallet to lock the tongue of one piece into the groove of another.
- Installing the last row – Angle each cork plank and place it on the floor. With a pull bar, lock it into place. When needed, cut and trim the cork planks using a saw or tile cutter to size them down into a proper fit.
- Finishing touches – Consider applying some polyurethane to make your floating cork flooring last longer. Use baseboard to cover the planks’ edges and nail the floor down. Finally, step back and enjoy your new beautiful floor!
Installing glue-down cork flooring
- Prepare the site for installation – Measure the area and decide whether you will need to cut and trim cork tiles to complete a row or fit the size of the room. Make sure the subfloor is even and levelled. If needed, sand off high spots or fill any gaps with a ‘skim coat’.
- Spreading the adhesive – Spread a contact adhesive on the backsides of the tiles using a notched trowel and let it dry. You do this the night before, as the glue will remain active for up to 12 hours. Then, using the notched trowel again, apply a layer of adhesive on the subfloor and allow it to dry for 30 minutes.
- Laying the cork tiles – Begin installing the cork flooring tiles one quadrant at a time. When laying a tile, tap it lightly with a rubber mullet to secure the hold of the glue. Keep in mind that the adhesive can be very strong so once a tile is placed down, you won’t be able to move it. Ensure spacing between the tiles and the walls but don’t leave gaps between the tiles themselves.
- Final touches – Sand the floor using a drywall sander with 100-grit sandpaper followed by 150-grit sandpaper. Vacuum the entire floor twice to ensure a dust-free surface. Lastly, apply two to three coats of waterborne or oil-based polyurethane and then enjoy the results of your hard work.
As for the self-adhesive type of cork flooring, it is actually the easiest to install and does not require anything different as preparation from the things listed above. If you still need more detailed instructions for the installation itself, there are some you can find for self-adhesive type of flooring in our guide on How to Properly Lay Vinyl Floor Planks.
How much does cork flooring cost in Australia?
Cork flooring has been overlooked for some time because people believe that it comes only in brown colouring. However, nowadays, there are as many designs and colours as there are with any other flooring materials. The versatile designs and installation techniques can be a good enough reason to choose cork, but, of course, before deciding on laying cork flooring, it is important to know what to expect in terms of pricing.
The prices of cork flooring can begin from $60 per square metre and go up to $100, depending on the thickness of the tiles. The fact that cork flooring is durable and can last for years makes this type of flooring worth the cost, especially compared to other floor materials.
Here are some important factors that can play a role in the final cost.
- The size of your room – How many square meters do you need to be covered?
- The current type of flooring and its condition – It might need levelling prior to the installation and this means extra work for the technician.
- Type of the cork flooring – Glue down tiles, floating planks, or self-adhesive tiles come with different prices, too.
- Tools and materials – You will also need to take into account the cost of the protective polyurethane sealer and any other tools and materials you might need if you chose to lay the cork flooring yourself. If you decide to go with a professional installation, these tools will be provided and the materials will likely be included in the service price.
Takeaways
- Cork floors are a popular and sustainable flooring option;
- Cork as a material is durable, soft, water-resistant, and a good insulator;
- There are 3 main types of cork flooring – glue-down solid cork tiles, floating cork planks, and self-adhesive cork tiles.
- The installation of cork flooring is an easy and quick process that you can even do yourself.
You don’t have the time to lay your cork flooring yourself?
Contact usWe can lay cork tiles and other flooring the right way!