Many centuries ago, the Egyptians discovered ceramic tiles. Since then, the material has been praised for its many benefits, such as durability, strength, and water resistance. Ceramic flooring in Australia is also valued nowadays because it is made of clay – a natural material in abundance, making it a sustainable flooring option.
In this article, you will find out what the advantages and disadvantages of ceramic flooring are and its specific characteristics. Plus, we’ll share an easy-to-follow installation guide for the enthusiasts that want to lay their ceramic tile flooring themselves.
Ceramic VS Porcelain tiles
While ceramic and porcelain tiles are both made from heat-hardened clay, ceramic flooring is seen as the more affordable alternative to porcelain flooring. Both types of flooring are durable and water-resistant, however, porcelain tiles are fired at higher temperatures, therefore are harder and denser. Moreover, porcelain tiles have higher levels of water resistance.
Still, ceramic flooring has many advantages. To help you with the decision of whether ceramic tiles are right for you, here are the key pros and cons.
Ceramic tiles pros:
- Durable
- Strong
- Water-resistant
- Eco-friendly
- Versatile designs
- Cheaper than porcelain tiles
Ceramic tiles cons:
- Difficult to clean grouting gaps
- Heavy
- Softer than porcelain
- Difficult to remove
How to lay ceramic flooring tiles
Ceramic tiles are a great flooring option that can bring a fresh look to any space. The good news is that the installation process is easy and, with the right tools and preparational work, laying your ceramic tiles yourself can turn out to be a Mission Possible. However, if you don’t have the tools or the time, you can always hire a professional for flawless results.
So, without further ado, here’s how to lay ceramic flooring the DIY way.
Tools:
- Tape measure
- Notched trowel
- Screws
- Screwdriver
- Tile spacers
- Rubber mallet
- Rail tile cutter/Wet tile saw
- Tile nipper
- Safety glasses
- Rubber float
- Sponges
Materials:
- Thinset mortar
- Cement backer board
- Fibreglass seam tape
- Haze cleaner
- Grout sealer
Step 1. Determining the layout of the tiles
Measure the room and calculate how many tiles you will need. The number will also depend on the desired floor pattern. For straight-lay, you’ll need roughly 10% extra material. However, if you love the look of diagonal tiles or any other fancy floor laying, an additional 15-20% will be good to have on hand.
Keep in mind that you will probably need to cut some of the tiles to fit the size of your space, however, make sure to plan half-cut tiles or larger to install against the walls. Smaller pieces take away from the professional look. Don’t forget that you will need to leave about a 1 cm gap along the walls.
Step 2. Cleaning the area
The area where you will be installing the ceramic tiles will need to be completely dry and dust-free, and the surface smooth and levelled. If there is any trim work in the room, removing it beforehand is preferable.
Step 3. Preparing the surface
Ceramic tiles need a rock-solid base to be secure and durable. Tile backer board will be a good solution, but not just any board will do the trick, as some degrade in high-moisture environments. When laying ceramic flooring, it is advisable to use a cement board because it will help your flooring last longer.
To lay the cement board panels, apply a layer of thinset mortar and use a screwdriver to pin the panels to the surface. The screws will need to be around 20 cm apart. Lastly, glue the seams with fibreglass seam tape, fill them with thinset, and let it harden completely.
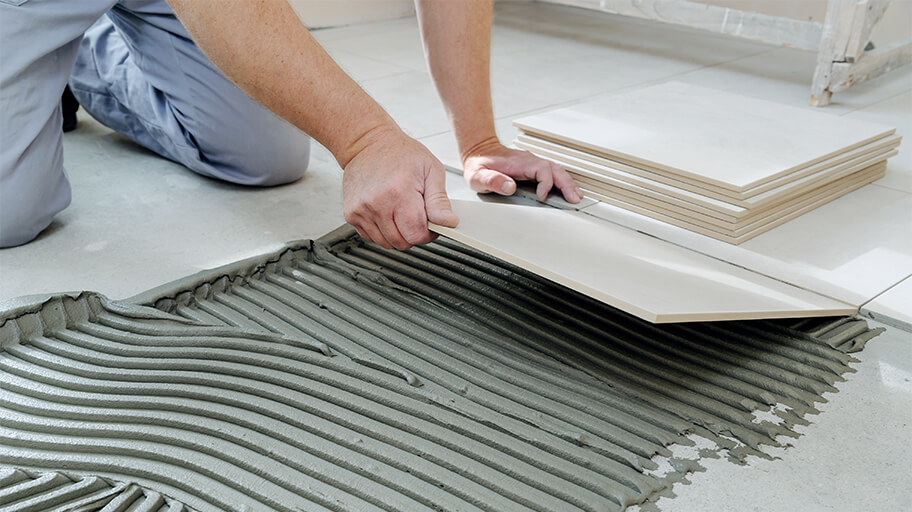
Step 4. Applying mortar
Using a notched trowel and holding it at a 45-degree angle, spread the thinset mortar over the cement base. Make sure to spread it over an area slightly larger than the size of a tile, but don’t apply mortar to huge sections – it may harden before you manage to lay the other tiles. Switching the sides of your notched trowel, go over the mortar, pressing firmly to comb the thinset.
Step 5. Laying the ceramic tiles
Place the ceramic flooring tiles over the wet thinset, pressing down gently. Twisting the tile back and forth will allow it to settle deeper into the thinset. Install the ceramic tiles following the desired flooring pattern. Use tile spacers at the corners to maintain consistent spacing.
Once they’re all in place, use a rubber mallet to level the tiles by lightly tapping each piece. We recommend that you complete one area before moving to another.
Step 6. Cutting tiles
Eventually, you will need to cut some of the tiles to fill the edges and fit the size of your space. Measure how much you will need to cut and then use a wet tile saw or a rail tile cutter to achieve the size you need. A tile nipper in hand can prove useful in case you need to fill more specific areas of the room. Don’t forget to wear safety glasses when working with any tile cutting tool.
Step 7. Grouting the ceramic tiles
Following the manufacturer’s instructions, mix the grout. Remove the tile spacers and, using a rubber float, press the grout into the seams. Then, holding the float at a 45-degree angle sweep across the tile seams. To avoid pulling the grout out of the gaps, move diagonally. Allow the grout to cure for about an hour, then take a wet sponge and wipe in circular motions to remove the excess grout.
To clean the left haze on the tiles, mix a haze cleaner with water, soak the sponge in it, and wipe down the surface.
Step 8. Final touches
To avoid water soaking in through gaps, apply a grout sealer over the grout lines using a brush. Another way is to spray the whole surface and then clean the excess off the tiles. Wait at least 24 hours before walking on your new flooring to allow the thinset to cure.
What type of flooring can you put over ceramic tiles?
Removing tiles can be a messy and time-consuming job, and many people opt for installing another flooring over their old tiles. If you also are wondering whether you can install another type of flooring over ceramic tiles, the short answer is yes. However, there are some factors that need to be considered first.
- Ceramic flooring – In general, installing a new layer of ceramic tiles over an old one is possible, but this can be a very labour-intensive task.
- Laminate flooring – Many homeowners in Australia find installing laminate flooring over ceramic tiles a great option. It’s cheap, solid and it doesn’t require adhesive. Unfortunately, laminate is not as durable as other types of flooring.
- Wood flooring – Another option can be wood flooring. In this case, you will need to underlay a plywood subfloor which, along with the wood flooring, will add some height. To avoid height problems, you can go for engineered wood that can be glued directly to the ceramic tiles.
- Carpet – Here, the track strap holes will need to be drilled and not nailed to avoid shattering the ceramic tiles. You can also use adhesive, but this can leave unwanted marks behind.
Takeaways
- Ceramic flooring tiles are durable, water-resistant, and made from a natural material.
- There are various types of flooring that can be laid over ceramic tiles.
- Laying ceramic tiles can be easy and it’s possible for beginners.
- However, if you are struggling with the process, consider seeking help from a professional handyman.
Refresh the interior of your space by getting ceramic flooring!
Contact a professional and make your job easier.
You can book our handyman services in Melbourne, Sydney, Brisbane and Perth!