Home renovation projects can be very creative and fun – if you know what you are doing, that is. There is a lot to learn before you start your design journey, including the different types of paint and their specifics. Nowadays, you can find on the market a wide range of paint colours and finishes, and picking the best option for your home can become overwhelming once you start going through all of those paint samples.
With all of this in mind, today we are going to talk about one of the most eye-catching options out there – gloss paint. From the different types of sheen levels to tips on how to use it – this article will give you all of the needed information about high-gloss paint.
Let’s begin with…
What are sheen levels?
Sheen levels are really easy to understand. To put it simply, they refer to how shiny and light reflective your paint will be once it dries down. Generally, there are exactly seven sheen levels for which you can learn about in detail in our article covering the topic. However, when it comes to using gloss paint, it’s important and enough to understand the difference between the two of the most used types of shiny paint – high-gloss and semi-gloss paint.
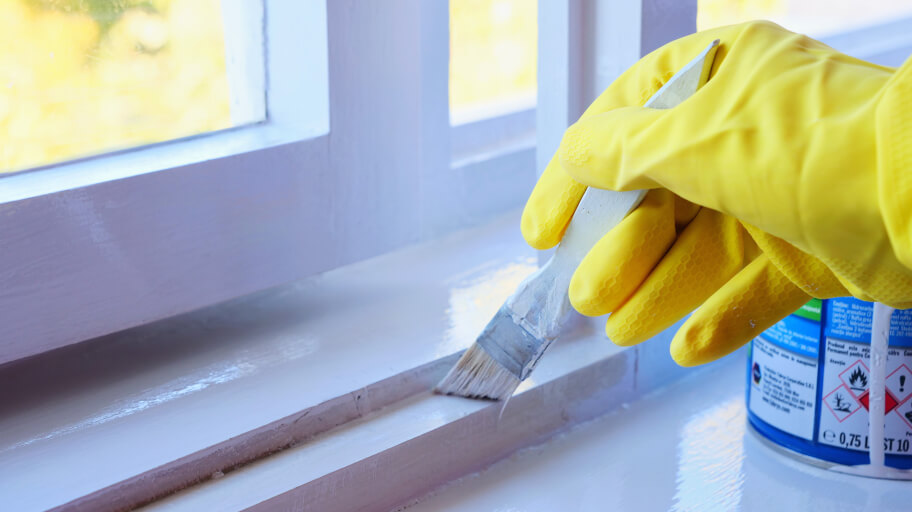
High-gloss paint has a gloss percentage of more than 80%, which makes it EXTREMELY shiny. The specific combination of pigments, binders, solvents, and additives makes it very durable and easy to maintain, which is why it’s the perfect option for wooden furniture, windows, doors, and even outdoor pieces. The only downside of high-gloss paint is that it highlights surface imperfections a little too well.
Semi-gloss paint has a gloss percentage of 35-60%, which still makes it quite shiny but not as much as high-gloss paint. This type of paint is a good compromise if you are looking for a nice sheen but not anything blinding. Similarly to high-gloss paint, the semi-gloss option is also very easy to clean and durable.
What is gloss paint used for?
As we’ve already mentioned, high-gloss paints are very forgiving – they are extremely durable, easy to clean, and are also stain resistant. All of these factors make the paint perfect for rooms with higher traffic and/or humidity levels, such as your kitchen and bathroom. And if you are looking for an option for your doors, windows, cabinets, moulding, and anything else that will be frequently used, high-gloss paint is the answer.
Helpful tips on how to use gloss paint
Now that you’ve found out everything you need to know about gloss paint, it’s time to learn how to use it. Be it for painting your ceiling, walls, or furniture piece, gloss paint has its specifics. With all of this in mind, here are some helpful tips on how to apply it.
A clean canvas is the best canvas
In order to achieve professional results, you’ll need to prepare the surface, no matter if we are talking about painting a piece of furniture, a wall, or your outside door. First, remove any old paint or wallpaper from the surface. Then, with a piece of fine-grit sandpaper, take care of any imperfections. If you spot any small holes, use a filling compound to conceal them, and sand them down again. Finally, clean the area with a mixture of warm water and plain soap to remove any dust, dirt, and grime.
Not to prime is a crime
If you want a quality painting job, applying a primer beforehand is a must. Many people don’t understand how the product exactly works, and choose not to use one at all. What a priming product does is that it grabs both onto the surface it’s applied on and the paint afterwards, creating a very strong and lasting bond between the two. So, before you start painting, go to the store to buy a bucket of primer, apply according to directions, let it dry completely, and only then open the paint can.
The right tools for the job
The surface you are going to paint will determine the type of tool you’ll use. Needless to say, choosing a high-quality applicator is very important, otherwise, you might end up with a streaky, bumpy, or bubbly final product. If you are planning to paint over a larger surface, such as a kitchen wall, for example, we suggest buying a short-nap or foam roller, as both create fewer bubbles. If you are working on a smaller scale, opt for a natural bristle brush – it’s perfect for a smooth, high-gloss paint application.
Layering is key
We can’t stress this enough – work slowly and in layers, as this is key for a quality high-gloss paint job. Use your applicator to apply very thin layers, making sure to take care of drips as soon as they appear. If you end up with bubbles or bumps, you’ll need to sand them down, and apply another coat afterwards. When you are done with your base layer, it’s very important to let it dry down completely before you apply the second one. Generally, the drying time will be somewhere between 24 and 36 hours, depending on the brand of paint. Once the surface is fully dry, you can paint on the second coat. Two layers of gloss paint are enough in most cases, however, if you think that the colour could be more vibrant or if you want to cover up streaks, you can apply a third, very thin coat.
Can you paint over gloss paint?
The short answer is yes, you can paint over high-gloss paint.
And what’s the catch?
You can’t apply the new paint directly over the old one – you have to prep the surface first. To make things easier for you, we’ve listed all of the steps you need to follow to successfully paint over high-gloss paint below:
How to paint over gloss paint
- Sand down the surface with a 180-grit sandpaper.
The new paint needs to grab onto something, and sanding the old layer will create a good base for it. Gently sand down the entire surface until it’s no longer sticky. Make sure that you are extra careful around corners and crevices – you don’t want to miss any areas.
- Clean the area.
Use the same combination we’ve mentioned earlier – some water and mild soap, to clean the surface from the sanding dust and to take care of any other dirt and grime. Remove excess moisture with a dry sponge or piece of cloth.
- Prime.
With the use of a paintbrush or roller, apply a high-quality bonding primer to the surface. This will help prevent future peeling and chipping of the paint. Wait around one to one and half hours for the product to dry down.
- Apply the paint in layers.
Apply the paint in layers. Apply one coat of gloss paint with your chosen tool, wait for it to completely dry, and then add the second layer. If necessary, opt for a third, very thin coat.
That’s it! You’ve just successfully painted over gloss paint!
Takeaways
- High-gloss paint is a very durable and easy to maintain option;
- High-gloss paint and semi-gloss paint are the ideal options for wooden furniture pieces, doors, windows, and outside areas;
- The key to achieving the best possible results is to use a primer first, work with the right tools, and to paint in thin layers;
- You can paint over gloss paint only if you prep the surface first, otherwise, the results will be far from good looking.
Need a professional hand?
Book Fantastic Handymen’s painting services!
You can book our handyman services in Melbourne, Sydney, Brisbane and Perth!