Laminate flooring emerged on the residential scene decades ago as an attractive, easy-to-install and budget alternative to solid hardwood flooring.
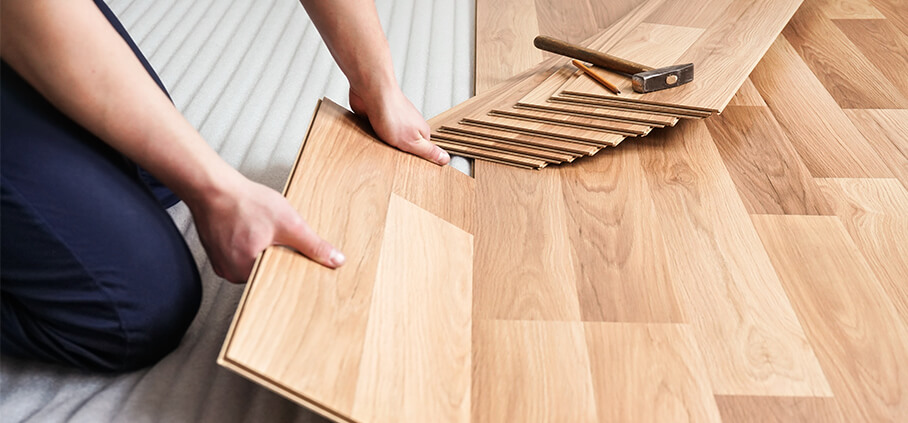
In most cases, laying a laminate floor is like putting together a large puzzle, and it shouldn’t take more than a day for almost any room. The kit you will need to complete the job is straightforward, and if you are in Australia, the DIY tools for laying laminate flooring will round to about $80-$100 (underlay, duck tape, hammer and tape measure). Of course, you’d need to add the floorboards to the equation.
Keep reading our guide if you:
- Want to know how to lay laminate floor;
- Would like to save on handyman costs;
- Wondered if laying laminate flooring is difficult;
- Want to know the different types of laminate flooring.
What is floating laminate flooring?
The floating laminate floor is the most preferred DIY type of installation – the planks are interlocked at the edges, shaping a solid mat that lays on the underlayment, in most cases without the requirement of glue.
There are different types of floating floor – laminate, vinyl or engineered wood. Laminate floorings won’t need glue or nails to stick, and that’s why they are the easiest to lay. Usually, laying engineered floors will require a hammer and nails and handyman skills. Vinyl flooring looks like ceramic tiles. Or the luxury versions can resemble real wood – that’s the most comfortable flooring to install, and it’s completely waterproof.
Is it easy to lay laminate flooring?
You can install laminate flooring even if you are a complete beginner, yet, some spaces like hallways and staircases require more advanced skills. If you are unsure, try installing laminate flooring under a door jamb on a closed door. Then, if the outcome isn’t quite what you like, only you would know about it. Otherwise, if working with wood is a novelty, then you better resort to professional floor installation services in your area. We can’t stress enough the importance of applying attention to detail and common sense when laying laminate flooring.
How to lay laminate flooring
Most of today’s laminate flooring uses a “click and clack” system to interconnect the planks. Installation is pretty straightforward on a floor of a standard rectangular room, and the only thing you should be mindful of is the underlayment. This is usually a thin layer of dense, resilient foam that will prevent the floor from clicking on the subfloor as you walk across it.
What do you need to lay the laminate flooring?
- Measuring tape to measure the space and determine the length of the laminate boards;
- A pencil for taking notes and drawing lines for sawing later if needed;
- A rubber mallet hammer to click the floorboards firmly into place;
- Jigsaw if you are more advanced and need to cut to adjust the boards;
- A level tool to ensure the floor of the room is level and to slide bevel tool to ensure you cut the boards to the right angle.
How to install laminate flooring the DIY way
- Boards acclimation.
Place the unopened panels in the room you will install them. Allow at least 48 hours, so the boards have time to adjust to the temperature and humidity.
- Moisture levels check.
Make sure humidity is not higher than 12%, and regarding moisture, the excellent rate is 45-65% RH (Relative humidity).
- Check the level of the floor.
Make sure the subfloor is completely level, dry and clean.
- Padding placement.
The underlay is designed to reduce noise and insulate your laminate flooring better. You can also add a plastic sheet or vapour barrier underneath the foam to protect the laminate from moisture (if the subfloor is concrete, especially).
- Boards placement.
Start from the top left corner. The finished side goes up, and the ridge side should be facing the wall. Lay the boards parallel to the long wall in the room.
- Spacers installation.
Tuck spacers in between the edge of the board and the wall.
Keep fitting the boards along the long wall, placing the next board the same way. Lay it end to end. Check the boards’ edges to the edge of the wall and be precise with levelling the rows with the wall. - Keep doing row by row.
Go to the second row and make sure that the joints in this row are staggered to the first row. Use a rubber hammer or one wrapped in a towel to tap and close the gap between the two rows gently. Continue until each row is laid – make sure that there are no gaps between the boards. Be diligent and double-check every third row to make sure the boards are tightly fitted and parallel to the wall.
- Trim the excess.
Trim where shapes are odd to fit into the remaining space. You would reach the opposite wall and probably would have to trim the boards. Measure well before you cut them with a table saw.
Cut the planks upside down for a smoother and more comfortable cut. - Remove the spacers and finish your floor.
The best way to lay laminate around a door frame is to see if the frame’s bottom runs the flooring under it for a perfect finish. Trim the existing door jamb, mark and cut the threshold laminate pieces and install them underneath the door frame.
How much does it cost to lay laminate flooring?
In Australia, the average cost for laying a square meter of laminate flooring varies between $20-$80. The difference between engineered wood and laminate is, of course, in the material used. Engineered wood is made from layers of real wood, and it comes at about double the cost of laminate. On average, a floating floor comes at the cost of $40. Prices vary depending on the project, so best consult with a professional and schedule a viewing for a precise estimate.
Takeaways
- To fit a floating floor is often a DIY type of installation of laminate flooring.
- Laying underlying foam is crucial – never skip cushioning the floorboards.
- Level well, then clean and dry out the subfloor, well before you proceed with the flooring installation.
- Always lay the floorboards parallel to the long wall of the room.
We can help you with installing any type of flooring
Book a handyman today.
You can book our handyman services in Melbourne, Sydney, Brisbane and Perth!


